
Order of installation work
1. The angle bracket is installed along the track according to the preset position. The spacing of the brackets should follow the standard spacing as much as possible, and ensure the parallel position with the centerline of the track.
2. Install the hanging clips on the angle brackets and put the nuts into the proper positions to ensure that the lifting clips can also move left and right on the long holes on the brackets.
3. Install the slide guide from one end of the track, making the distance from the end to the first support as 750 as possible.
4. Assemble the terminal jacket, joints and joint jackets, power input and jacket.
5. Install expansion components and set the clearance of the components according to the ambient temperature of the site.
6, install the clip.
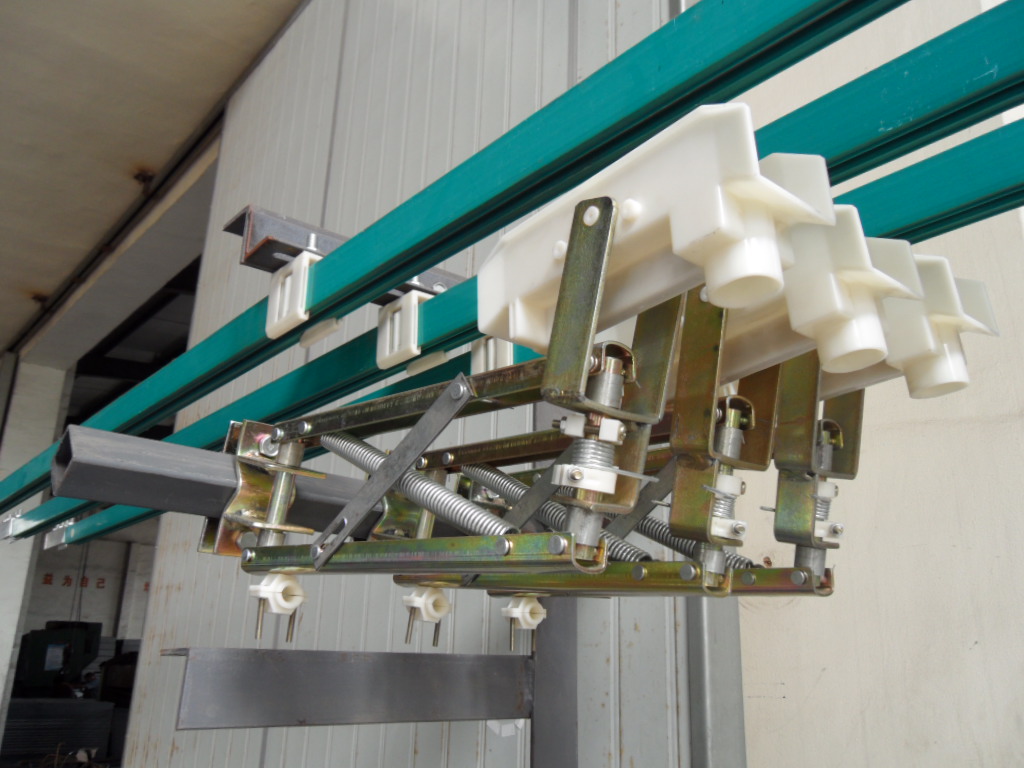
7. Select a reasonable position on the mobile device to install the current collector bracket to ensure that the current collector is at a standard height.
8, install the collector.
9. Connect the incoming cable and collector cable.
10. After confirming that the installation is correct, turn on the test and check if the phase sequence of the power supply needs to be changed.
11. Slowly run the equipment to both ends of the track. Observe whether there is any collision, fire or current collector deviation. If there is any abnormality, stop and power off immediately to find out the cause of improper installation and make adjustments.
12. After confirming that the device is running repeatedly and there is no abnormal phenomenon, turn off the power again and tighten all the fixing bolts that are attached to the hanging clips.
13, power test, confirm the installation is correct.
1. The angle bracket is installed along the track according to the preset position. The spacing of the brackets should follow the standard spacing as much as possible, and ensure the parallel position with the centerline of the track.
2. Install the hanging clips on the angle brackets and put the nuts into the proper positions to ensure that the lifting clips can also move left and right on the long holes on the brackets.
3. Install the slide guide from one end of the track, making the distance from the end to the first support as 750 as possible.
4. Assemble the terminal jacket, joints and joint jackets, power input and jacket.
5. Install expansion components and set the clearance of the components according to the ambient temperature of the site.
6, install the clip.
7. Select a reasonable position on the mobile device to install the current collector bracket to ensure that the current collector is at a standard height.
8, install the collector.
9. Connect the incoming cable and collector cable.
10. After confirming that the installation is correct, turn on the test and check if the phase sequence of the power supply needs to be changed.
11. Slowly run the equipment to both ends of the track. Observe whether there is any collision, fire or current collector deviation. If there is any abnormality, stop and power off immediately to find out the cause of improper installation and make adjustments.
12. After confirming that the device is running repeatedly and there is no abnormal phenomenon, turn off the power again and tighten all the fixing bolts that are attached to the hanging clips.
13, power test, confirm the installation is correct.
Head Lamp,Rechargeable Head Lamp,LED Head Lamp,USB Rechargeable LED Head Light
Yuyao Flylit Appliance Co.,Ltd , https://www.flylitlight.com